Adding Elements to a Model
We recommend using the SF Modeler when adding elements to a model. Before a new Element can be added to a model, it needs to be created and added to the database, if it does not already exist in the database. Once that is done, the Element can be added to the model. Typically, a collection of tanks, meters, flows, and process units can be predefined before the Model is created using Templates. Similar elements in the database are created in bulk using the AF Builder.
To add elements to a model:
Open the AF Builder.
Select View > AF Browser.
The AF Browser dockable pane displays.
The Database box is automatically filled with the database you had previously selected.
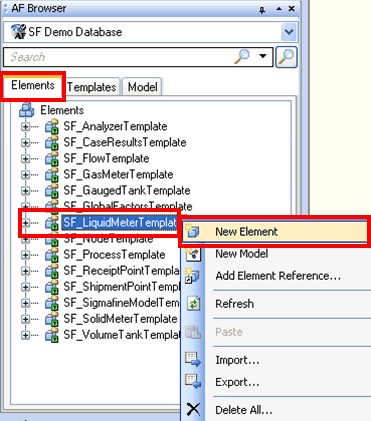
Click on the Elements tab.
Right-click on the Element template you want, and select New Element from the pop-up menu.
The AF Property window opens.

In the Name box, type a unique name for the element.
(Optional) In the Description box, type a short description for the new element.
Specify any attributes, etc. to finish the configuration of the element.
Click the Attributes tab to open the element's attributes.
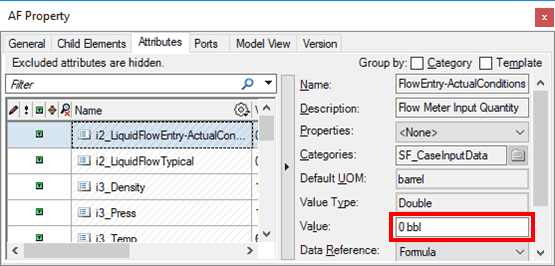
To specify an attribute's value, select the Attribute to display its details (Name, Description, Properties, etc.).
In the Value box, type in the new value for the selected attribute.
Click on the Elements tab.
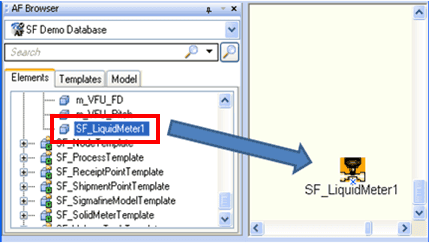
Locate the Element you just created and drag it to Model display area (as shown in Figure 157).
The representation of the dragging Element can be see on the display. The Element can also been seen on the 'Model' tab in the AF Browser.
Note: On the Elements tab, elements can be arranged by name, category or template. We recommend arranging by 'Template' to make browsing easier.
Now that the Element has been created, you need to finish adding it to the database by checking it in.
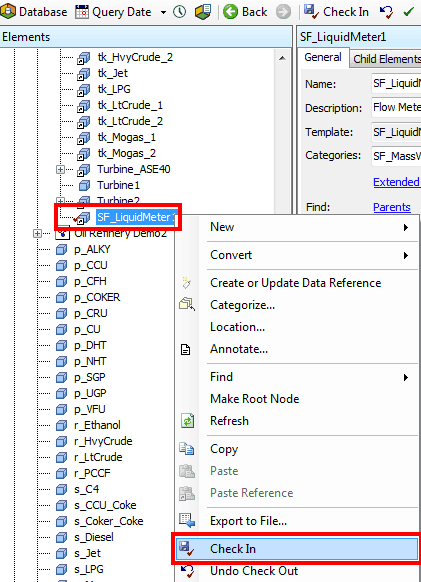
On the Model tab, locate and right-click on the new Element and select Check In.
This action checks in only this particular element; no other pending changes for the database are checked in.